
3D printing is opening up new possibilities in lighting design. Because it builds objects layer by layer, it can create shapes, textures, and internal patterns that are difficult or expensive to make with conventional methods. Designers and manufacturers use it to produce everything from decorative lampshades and pendant lights to custom diffusers, prototypes, and low-volume lighting components.
The technology does not replace every traditional lighting process. Instead, it offers a useful alternative when a project requires customization, complex geometry, rapid development, or small production runs. Understanding the materials, printing methods, and safety considerations is essential to using it successfully.
How 3D Printing Is Used in Lighting
A light fixture has several parts, and not all of them have the same requirements. The shade or diffuser may need to shape and spread light, while the base and mounting components may need to provide strength and stability.
3D printing can be used to make:
- Lampshades and pendant-light covers
- Diffusers and decorative lenses
- Light housings and enclosures
- Wall sconces and ceiling fixtures
- Table-lamp bases and decorative stands
- Cable guides, brackets, and mounting accessories
- Prototypes for new lighting products
Some components can be printed as finished pieces. Others are prototypes that help a designer evaluate a shape before producing it through injection molding, casting, or another method.
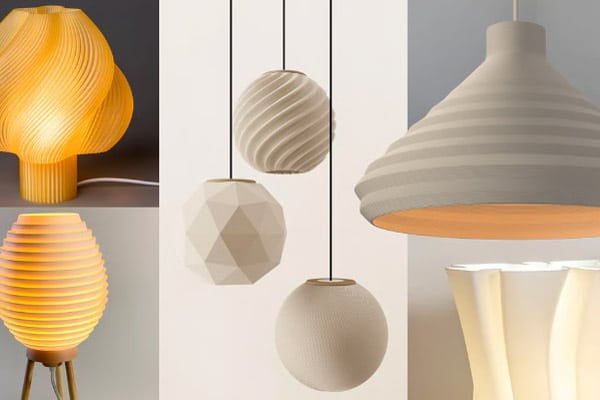
3d printed ceiling lamps*
Creating Distinctive Lampshades
Lampshades are among the most visible applications of 3D printing in lighting. A printed shade can have a sculptural form, repeating geometry, or a patterned surface that would be challenging to produce with standard manufacturing techniques.
Designers can create:
- Curved, organic shapes
- Geometric forms and faceted surfaces
- Perforated or lattice-like patterns
- Ribbed, pleated, or layered textures
- Shades with custom openings and proportions
The shape affects both the appearance of the fixture and the way it distributes light around a room. A dense pattern may create dramatic shadows, while a more open design can allow greater light transmission. Designers can adjust the size and spacing of openings to change the visual effect.
Designing Diffusers and Light Covers
A diffuser softens light and helps reduce glare by spreading it across a wider area. 3D-printed diffusers can be designed with varied thicknesses, textures, or internal structures to produce a particular lighting effect.
For example, a textured diffuser may scatter light more evenly, while a patterned cover may create decorative highlights on nearby walls. A custom diffuser can also be designed to fit an unusual fixture or integrate with a specific product enclosure.
The choice of material and print process strongly affects the result. A part that looks translucent in daylight may transmit or scatter light differently when illuminated. Testing a sample with the intended light source is therefore an important part of development.
Producing Custom and Made-to-Measure Fixtures
Traditional production often favors standardized dimensions because molds and tooling can be costly to change. With 3D printing, dimensions can be adjusted in a digital design without making new tooling.
This makes it easier to produce lighting for:
- A specific room or architectural feature
- A non-standard ceiling height
- A narrow hallway or small space
- A restoration project with uncommon fixture dimensions
- A customer’s preferred style, color, or pattern
Exploring Light and Shadow
A printed lighting object can be designed to affect the surrounding space, not just contain a bulb. Openings, grooves, ribs, and layered surfaces can create patterns of light and shadow on walls and ceilings.
The effect depends on several factors:
- The distance between the light source and the shade
- The direction and intensity of the light
- The size and shape of openings
- The angle and depth of surface features
- The color and translucency of the material
A simple change in pattern spacing can make a fixture cast either soft, diffuse shadows or sharply defined shapes. Designers often test several patterns to find the right balance between visual interest and useful illumination.
Choosing a 3D Printing Technology
Different printing methods are suitable for different lighting parts.
FDM or FFF
Fused deposition modeling (FDM), also called fused filament fabrication (FFF), melts plastic filament and deposits it in layers. It is widely used for prototypes, lampshades, decorative housings, and larger components.
Advantages:
A wide range of accessible materials and colors
Suitable for larger shapes
Useful for checking form, fit, and light patterns
Considerations
Layer lines may be visible
Part strength can vary with print orientation
Thin sections may require careful design or reinforcement
Finishing may be needed for a smoother appearance
SLA/DLP Resin Printing
Stereolithography (SLA) and digital light processing (DLP) cure liquid resin to create detailed parts. They are useful for smaller components, fine patterns, and prototypes that need a smooth surface.
Advantages
Fine details and smooth surfaces
Suitable for intricate decorative features
Useful for evaluating smaller designs
Considerations
Build size may be limited
Resin requires careful handling, washing, and curing
Material properties vary by product
A clear-looking resin is not necessarily suitable for use near heat or electrical components
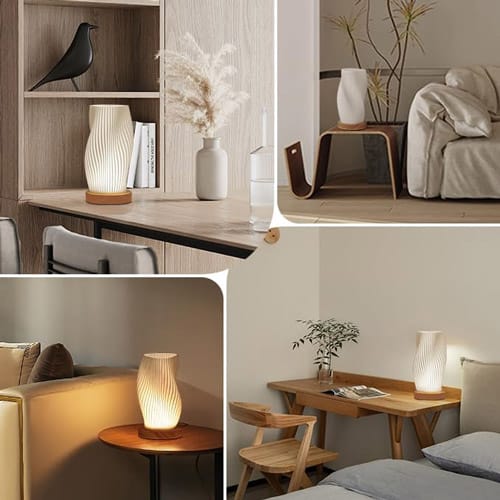
3d printed table lamps**
Materials for Printed Lighting
Choose materials according to the component’s function and operating conditions—not appearance alone.
PLA: Easy to print and available in many colors. It can suit decorative prototypes and parts kept away from significant heat, but may soften at elevated temperatures.
PETG: Often used for functional prints and some covers or housings. Consider its temperature, light-exposure, and durability limits for the intended application.
Specialty plastics: Some materials are designed for more demanding conditions. Check the specific material data and suitability for the complete fixture.
Resin: Useful for detailed parts and smooth surfaces. Resin properties such as strength, UV resistance, and heat tolerance differ, so follow the manufacturer’s processing and safety instructions.
Challenges and Limitations
3D printing offers flexibility, but it also has limitations:
Large shades may take many hours to print.
Layer lines and support marks can require extra finishing.
Thin or intricate sections may break during use.
Some materials can discolor, deform, or become brittle over time.
Printed parts may not meet safety or certification requirements without testing.
The cost per part can be higher than conventional manufacturing at large volumes.
These challenges do not make the technology unsuitable. They simply make material selection, design, testing, and production planning important.
From Prototype to Production with LT Century
A lighting project may need different manufacturing processes at different stages. LT Century offers 3D printing, CNC machining, vacuum casting, and injection molding, giving product teams several options to consider as a design develops.
3D printing can help create and assess early prototypes, especially when a part has complex geometry or needs frequent revisions. Depending on the design, materials, finish, quantity, and budget, CNC machining or vacuum casting may be considered for further development or smaller production runs. Injection molding may be an option for higher-volume production when the design and tooling investment make it appropriate.
Selecting the right process early can help teams plan for part quality, production quantities, and project requirements. The best approach depends on the specific lighting component and its intended use.
Conclusion
3D printing gives lighting designers new ways to develop custom shapes, patterns, diffusers, and housings. It can speed up design iterations and make small production runs more practical. Whichever manufacturing method is selected, successful lighting products require careful attention to material performance, heat, light quality, durability, and applicable safety standards.
Reference
*Image from https://all3dp.com/
**Image from https://www.home-designing.com/